
Tender, juicy Instant Pot pulled pork made from pork butt in about an hour! Perfect for sandwiches, tacos, or meal prep plus tips to avoid the burn notice and make-ahead instructions.
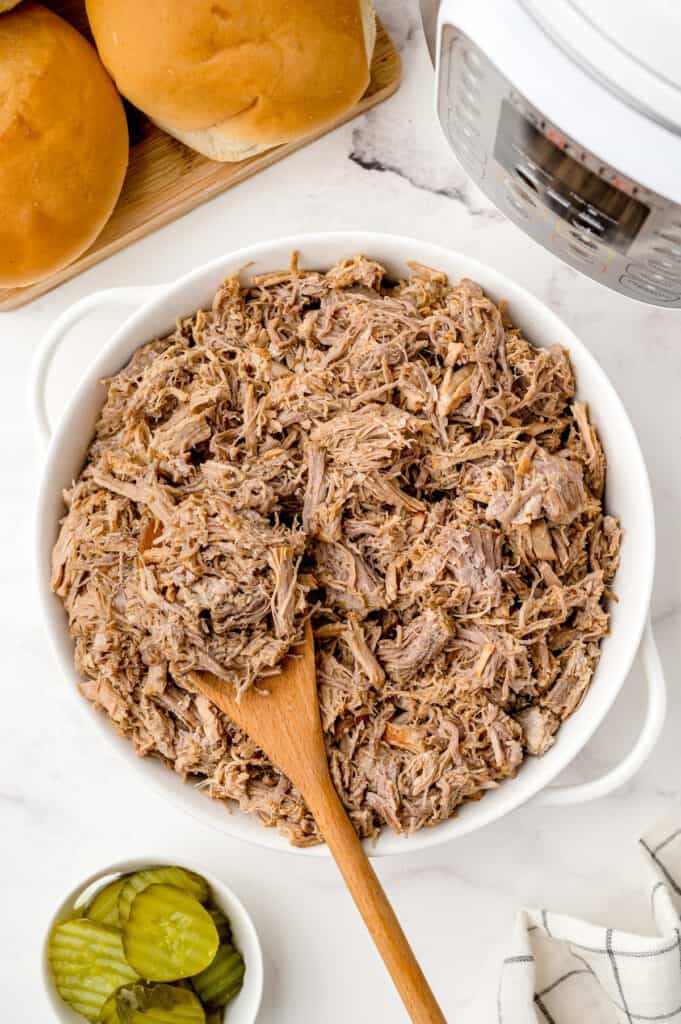
If you love the flavor of slow-cooked barbecue pork but don’t have hours to wait, this Instant Pot Pulled Pork recipe is your new weeknight (or harvest season) hero. With just a few simple ingredients and your trusty pressure cooker, you’ll have juicy, fall-apart pork ready for piling onto buns, nachos, or baked potatoes as an easy party food idea.
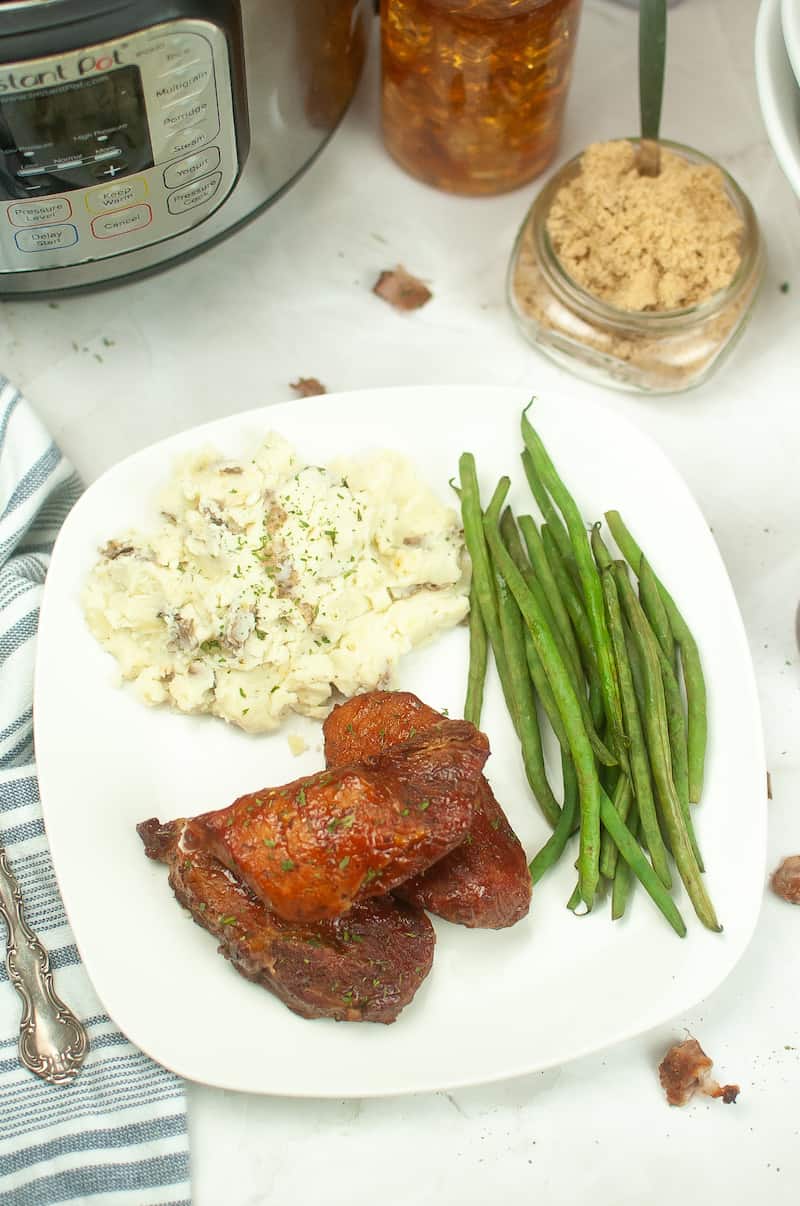
Pull-apart tender, flavorful pork in about an hour — perfect for sandwiches, tacos, or feeding your hungry crew after a long day in the field.
Why you'll love this recipe
- Quick & hands-off: No babysitting needed — the Instant Pot does the heavy lifting.
- Tender and juicy: Pressure cooking locks in moisture and flavor.
- Freezer-friendly: Perfect for meal prep or field meals later in the week.
- Crowd-pleaser: Everyone from the tractor driver to the toddler will want seconds.
Craving more pressure cooker comfort food? Try my Instant Pot Cube Steak and Gravy.
Is Pork Butt the Same as Pork Shoulder?
Yes—and no. 🤣
Both pork butt and pork shoulder come from the shoulder of the pig, but they're slightly different cuts.
- Pork butt (also called Boston butt) comes from the upper part of the shoulder. It has more marbling, making it ideal for pulled pork because it stays juicy and shreds beautifully.
- Pork shoulder (sometimes labeled picnic shoulder) comes from the lower part of the shoulder. It's a little leaner and often sold with the skin attached.
Clear as mud, right? For this recipe, either cut will work well. Pork butt is my favorite because the extra fat creates incredibly tender, flavorful pulled pork in the Instant Pot.
Ingredients
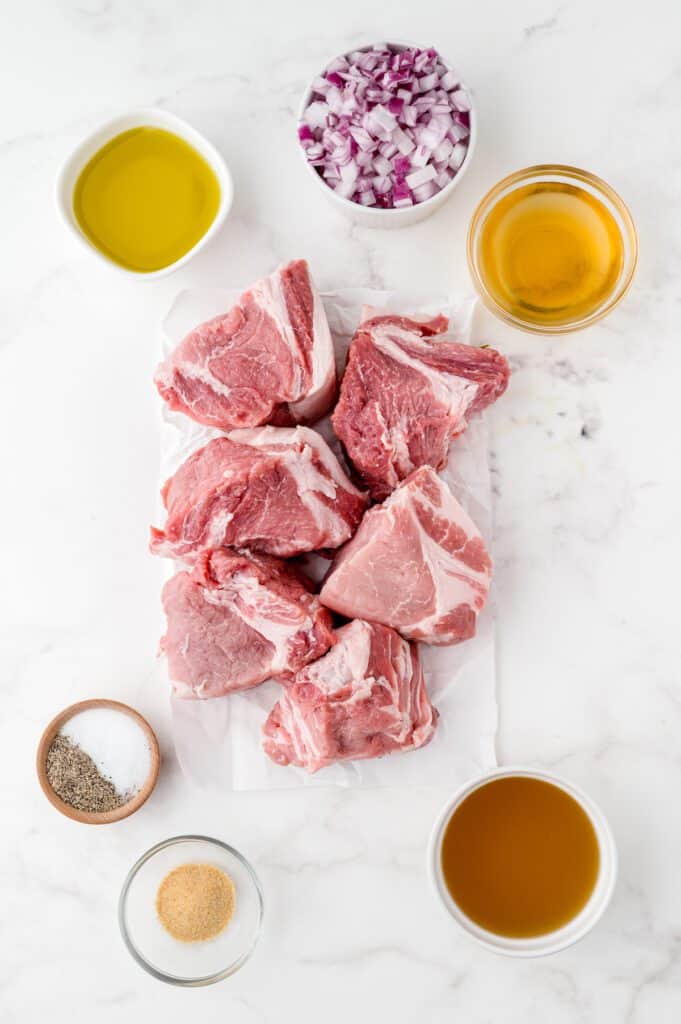
- extra virgin olive oil
- Pork Butt (Boston Butt) – Despite the name, this cut comes from the upper shoulder of the pig—not the rear (in case you're wondering). It's one of the best cuts for making tender pulled pork because of its rich marbling. A pork shoulder (also called a picnic roast) also works well.
- garlic powder, salt and black pepper - these are all seasonings you probably already have in your spice cabinet
- red onion
- chicken broth
- apple cider vinegar
- prepared BBQ sauce - pick your favorite brand. We really like Sweet Baby Ray’s and their no sugar bbq sauce too.
- Buns - if you’re making this pulled pork into sandwiches. You can use hamburger buns, slider buns, or my homemade Hawaiian sweet rolls.
Note: I don’t use any brown sugar in my recipe, especially if I’m adding barbecue sauce at the end. It already has sugar in it and I find it to be sweet enough.
How to make Instant Pot Pulled Pork
Let’s start by making our pulled pork rub. We’re using simple ingredients of garlic powder, salt and pepper. Really, that’s all you need!

- Step 1: Cut the pork into large chunks, about 2–3 inches each. Pat dry and rub all sides with your the seasoning.
Set your Instant Pot to Sauté and add olive oil. When it’s hot, brown the pork in batches. Don’t overcrowd — give the pieces space to get that golden crust.
Farm girl tip: When the pork is ready to turn, it will release easily from the pot. If it’s sticking, give it another 10 seconds.
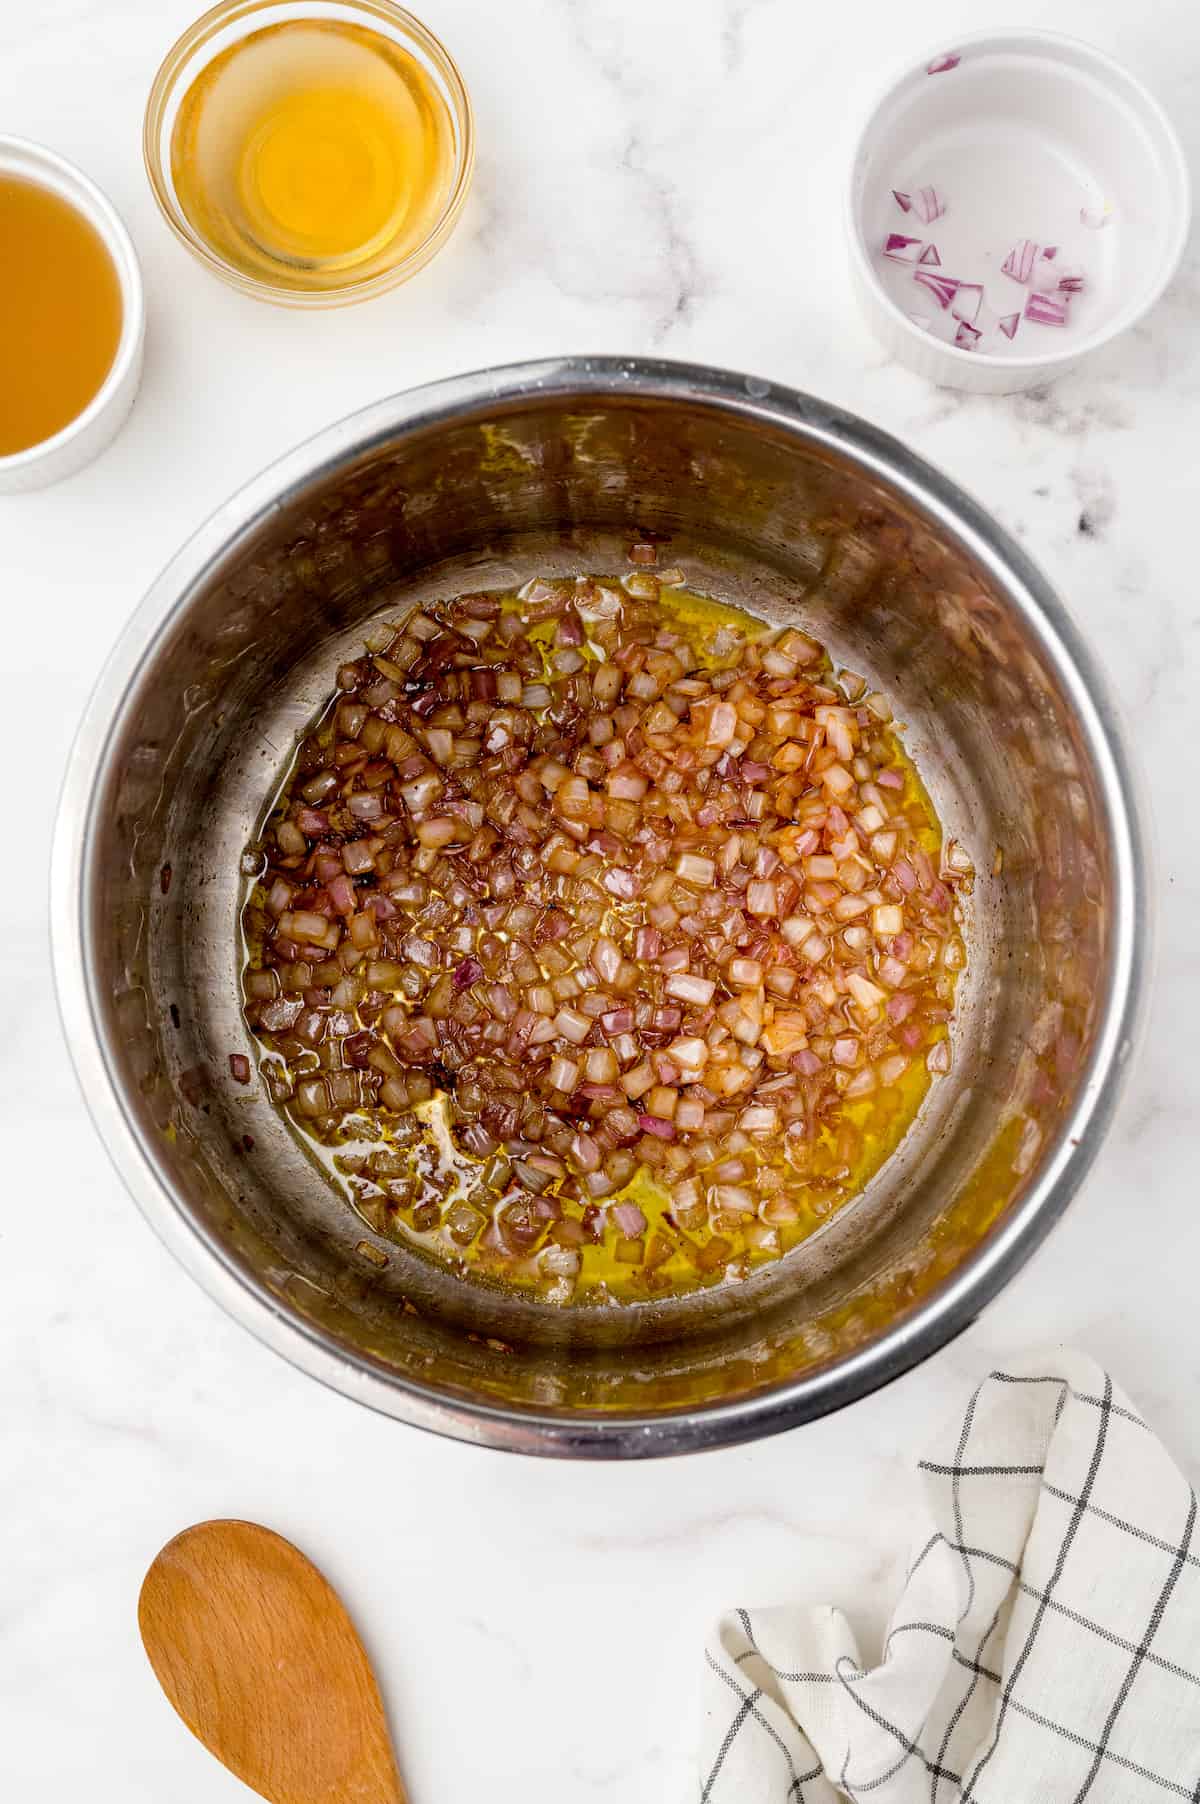
- Step 2: Sauté Onions & Deglaze. Once all the pork is browned, remove it to a plate.
Add sliced onions to the pot and cook for 2–3 minutes, stirring to pick up those flavorful bits. Pour in the chicken broth and apple cider vinegar, using a wooden spoon to gently scrape any brown bits off the bottom — this step prevents the dreaded “burn” notice later on.

- Step 3: Pressure Cook. Add the browned pork back to the pot and top with a portion of BBQ sauce (save some for later).
Secure the lid, set the vent to Sealing, and cook on High Pressure for 50 minutes.
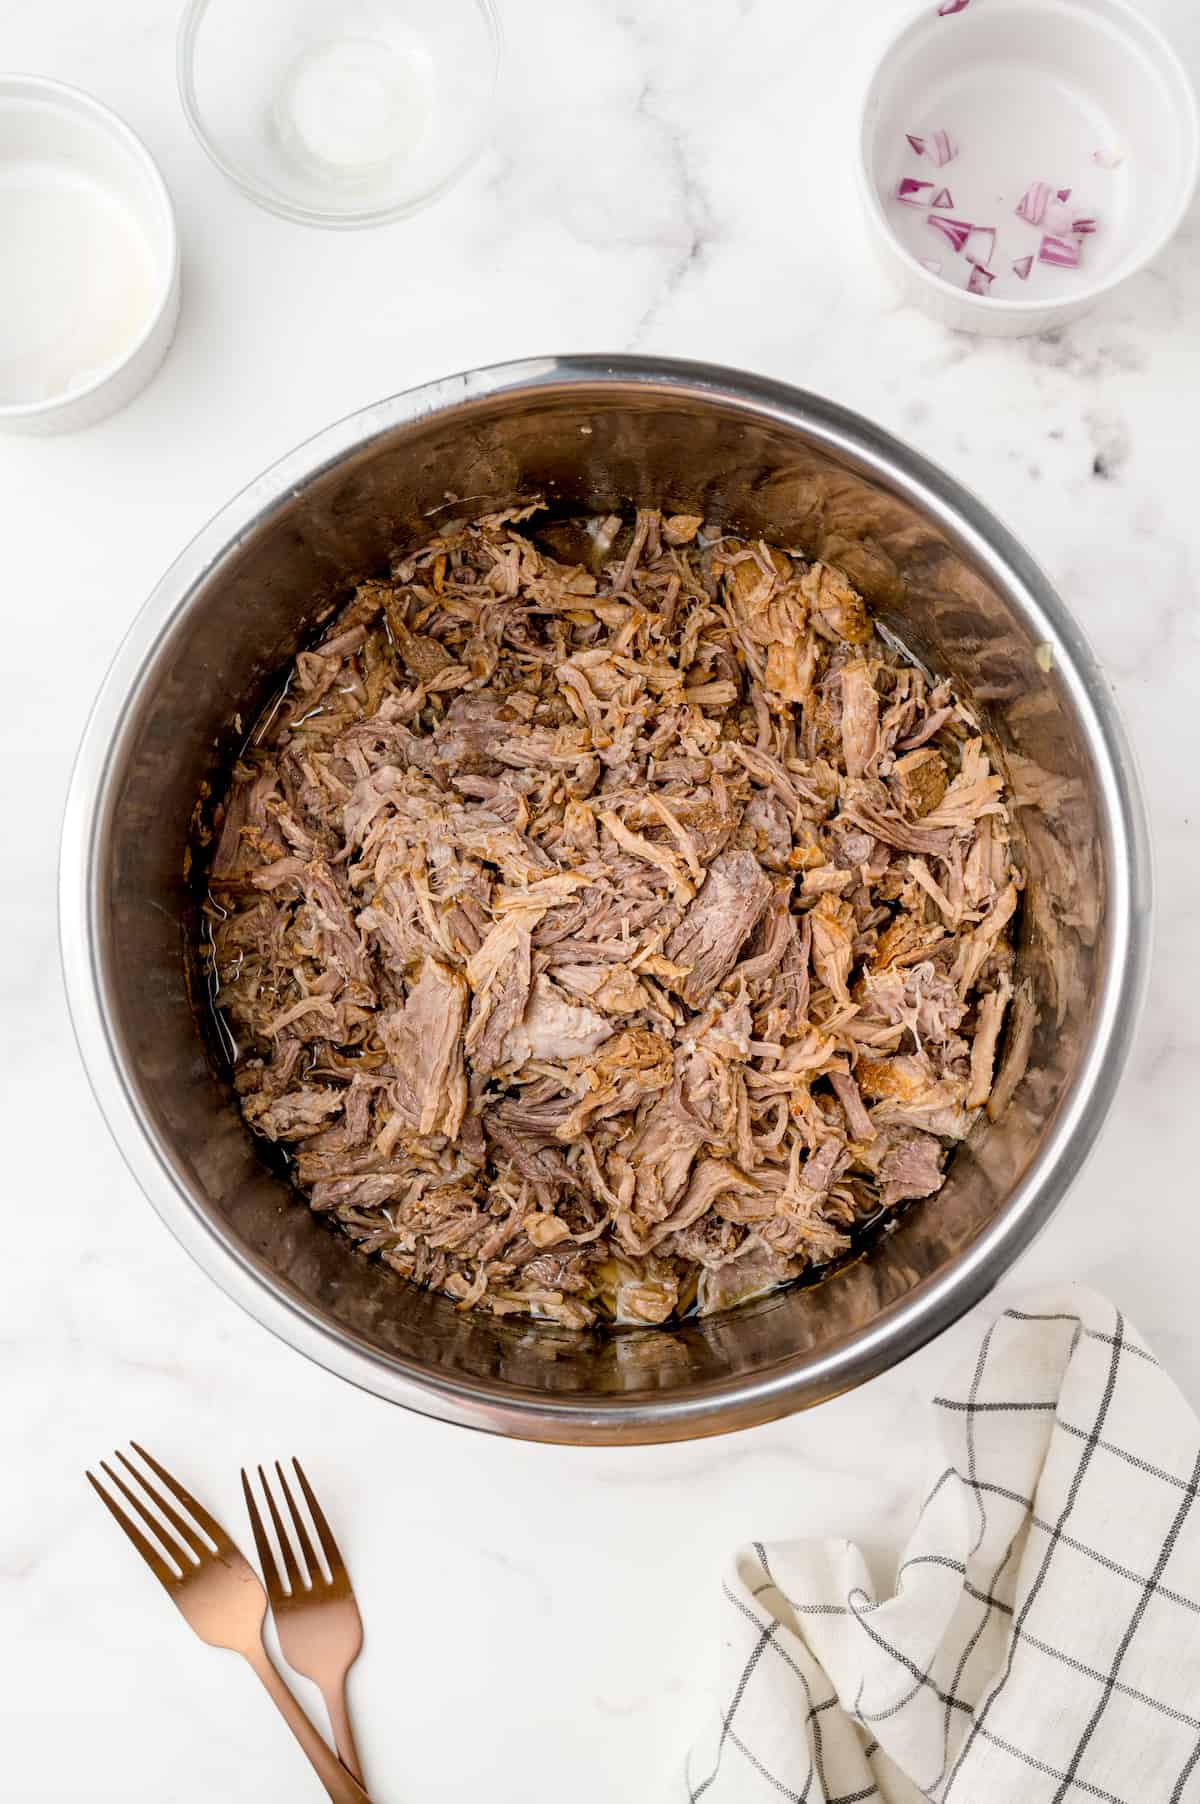
- Step 4: Natural Release. Allow the pressure to release naturally for 10 minutes, then carefully quick release any remaining steam.
Transfer the pork to a cutting board and shred using two forks. Return the meat to the pot, stirring it into the juices. Let it sit for 5 minutes to soak up all that flavor.
Toss with a little more BBQ sauce if you’d like and serve it up however you please — on buns, in tacos, over rice, or just straight from the pot (no judgment here).
Want to cook your pork in a crockpot? Check out my slow cooker bbq pulled pork!
Farm Girl Tip
Don’t skimp on the liquid! That broth + vinegar combo is key for building steam and flavor.
Save This Recipe For Later
Storage Suggestions

Store leftovers in an airtight container for up to 4 days or freeze for up to 3 months. Reheat gently with a splash of broth to keep it juicy.
Serving Ideas
- Classic pulled pork sandwiches with coleslaw
- BBQ pork baked potatoes
- Pulled pork nachos
- Over rice or tucked into pulled pork wraps
What to Serve with Pulled Pork
One word - creamy coleslaw. But really, when it comes to side dishes, pulled pork plays well with just about everything. If you’re going for cozy comfort food, you can’t go wrong with a scoop of Cheesy Scalloped Potatoes or a pan of Maple BBQ Sweet Potatoes — both are hearty, flavorful, and made with simple ingredients you probably already have on hand.
If you’re feeding a crowd, add a make-ahead salad like Caprese Pasta Salad or Portillo’s Chopped Salad — both travel beautifully and hold up well at cookouts or in the field. And because every good meal deserves a sweet ending, my Soft Pumpkin Cookies make the perfect simple dessert.
No matter which you choose, these sides turn your pulled pork into a full meal that’s comforting, practical, and totally crave-worthy.

FAQS
That’s usually caused by stuck-on bits at the bottom or not enough liquid. Stop the cook, scrape the bottom clean, add another ¼ cup broth, and restart.
You can, but it won’t be as juicy. Pork butt (shoulder) has more marbling, which means more tenderness and flavor.
It might need just a few more minutes. Lock the lid and cook on High Pressure for another 5–10 minutes.
Absolutely. Pork shoulder and pork butt can usually be used interchangeably in recipes like this. Pork butt tends to be a little more marbled, while pork shoulder is slightly leaner, but both become tender and easy to shred after cooking.
🍽️ Ways to Use Pulled Pork Leftovers
- BBQ pork sliders for tailgates or field lunches
- Loaded baked potatoes
- Pulled pork quesadillas or grilled cheese
- BBQ pork pizza (yes, please!)
- Stirred into chili for extra smoky flavor
I have more leftover pulled pork recipes here!
How to Freeze Pulled Pork
- Let the pork cool completely.
- Portion into freezer bags or containers, adding a little cooking liquid to each.
- Label, date, and freeze for up to 3 months.
- Thaw overnight in the fridge and reheat in a skillet or slow cooker with a splash of broth.
This Instant Pot Pulled Pork Butt recipe gives you all the tender, smoky comfort of slow-cooked pork — without tying you to the kitchen all day. Whether it’s a family dinner, a Sunday game day, or a late-night harvest meal, this one delivers every time.
So go ahead, grab that pork roast from the freezer, dust off your Instant Pot, and get cooking. Supper’s going to be real good tonight.
More Instant Pot Recipes


Recipe

Instant Pot Pulled Pork Butt Roast
Ingredients
Method
- Press the “Sauté” mode on the Instant Pot. While the pot heats, mix the garlic powder, salt and pepper together in a small bowl. Season the pork shoulder pieces with the seasoning mix.
- When the pot signals “Hot”, add 1 tablespoon olive oil and half the pork shoulder pieces. Sear until pork is browned on all both sides, approximately 1-2 minutes per side, (when it’s ready to turn it will easily lift from the bottom of the pot. The objective here is to get some color on your pork roast.
- Transfer to a large, rimmed plate. (The rimmed plate will catch any juices). Set aside.
- Repeat Step #2 with another tablespoon of olive oil and the remaining pork. Once seared, transfer to the rimmed plate with the rest of the pork and set aside.
- Add remaining tablespoon of olive oil plus the red onion. Cook, stirring frequently, until soft, about 3-4 minutes.
- Add the chicken broth, apple cider vinegar and ¾ cup of the bbq sauce to the pot and use a spoon to gently scrape the brown bits from the bottom of the pot. (This is important both for flavor and to avoid a burn message as the pork cooks).
- Add the pork pieces and any accumulated juices back into the pot and add the cover. Make sure the silicone ring is inserted and the vent is closed. Lock the lid into place.
- Set the pressure valve to “seal” and select the “Manual” option on the highest setting. Adjust cook time to 50 minutes under high pressure.
- When cooking time is complete, allow the pot to do a pressure release naturally for 10 minutes, and then do a quick release for any remaining pressure.
- Carefully remove the lid and shred the pork with two forks. Allow the shredded pork to sit in the warm cooking liquid for 5 minutes to soak up more flavor before serving, if desired.
To serve, transfer the shredded pork with tongs to a large bowl and toss with remaining BBQ sauce.